

How To Create A Category In Sharepoint
One of the most popular web parts in SharePoint has got to be News Web Part. I love it so much myself, I blogged quite a few times about it in the past. However, here is an interesting requirement I hear all the time from users. You want to publish different kinds of news on the site and separate them into categories. For example, Company News, New Hire News, Message from CEO. By default, all the news posts you publish on a site are lumped together into one News Web Part you add to the page. How do we separate them? Well, there is a trick to manage categories of news using custom metadata. So grab some popcorn, and let me demonstrate it 🙂
Step 1: Create custom metadata on the Site Pages library
Yes, baby, metadata to the rescue again! This time though, we are not creating metadata on a document library, but rather a Site Pages library.
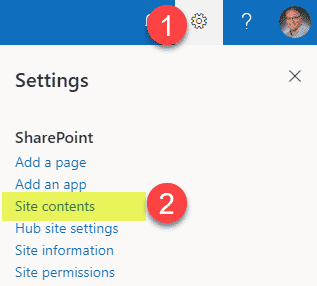
- Navigate to the Site Pages Library by going to Gear Icon > Site Contents
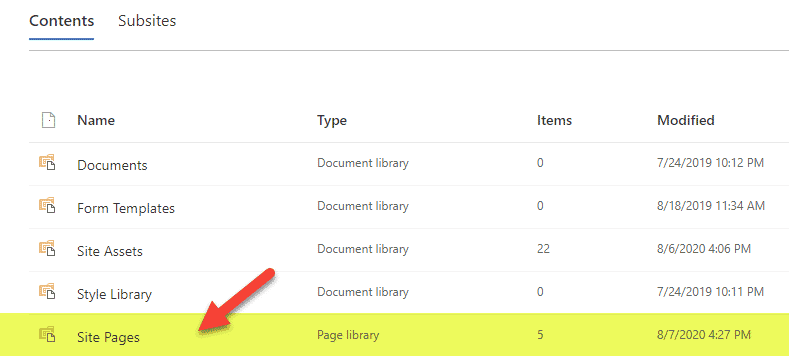
- Click on the Site Pages Library
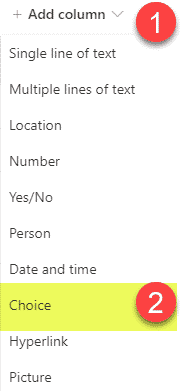
- Create a Category Column by clicking +Add column, then selecting Choice
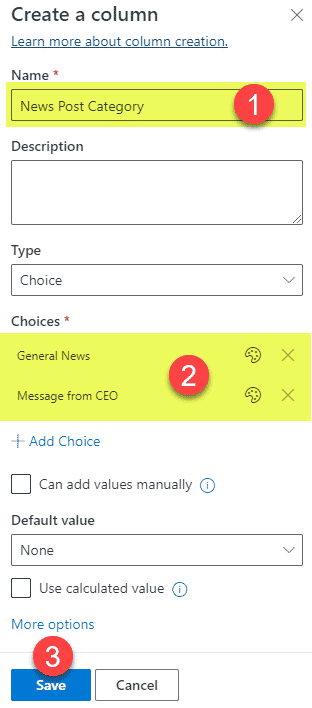
- Create the Category Column with whatever drop-down choices you wish (however you decide to split up your post categories). Click Save
Step 2: Create and tag some posts
Next, we will need to create some posts and, most importantly, tag them with the appropriate category we created in the previous step.
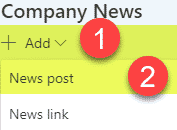
- Create a new News Post by clicking Add > News post, then choosing a blank template
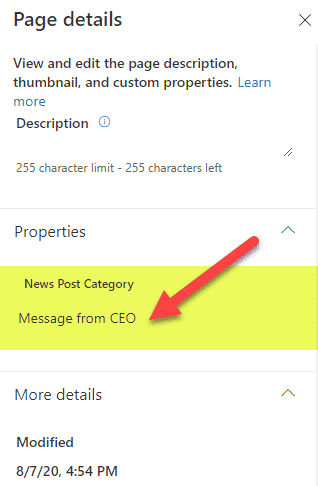
- While creating/editing the news post, click on Page Details

- On the Page Properties Side Panel on the right-hand-side, assign the proper label/tag to the news post you are creating
- Click Post news to publish the news post

Step 3: Add News Web Parts and filter by metadata
I bet you are wondering why we went through the pain of doing the above two steps. Well, it will all be clear now. In this last step, we will filter the News Web Part according to the desired metadata category.
- Edit the Page by clicking the Edit button in the upper-right-hand corner of the page
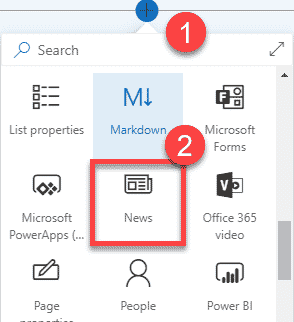
- Add a News Web Part to your SharePoint page
- In this News Web Part, we will display just the Message from CEO posts. When you add the News Web Part, you will notice that it still shows all the posts. This is because we did not filter it out yet.
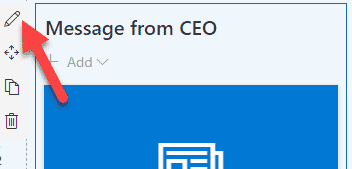
- Click the pencil icon on the left to access additional settings
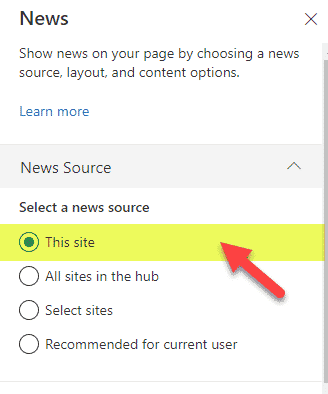
- On the right-hand-side panel, choose This site under Select a news source
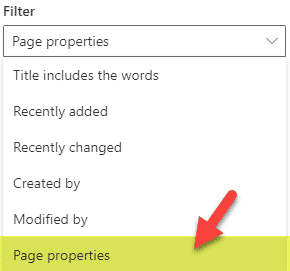
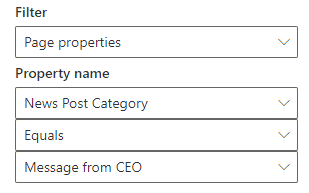
- Under the Filter section, select Page properties
- Next, configure the Filter such that the News Page Category we created in Step 1 is equal to Message from CEO. Essentially we are telling the News Web Part to display just this category and filter out the rest.
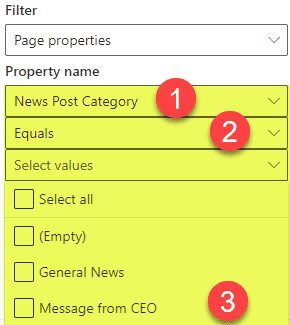
- It should look just like this
- Republish the Page

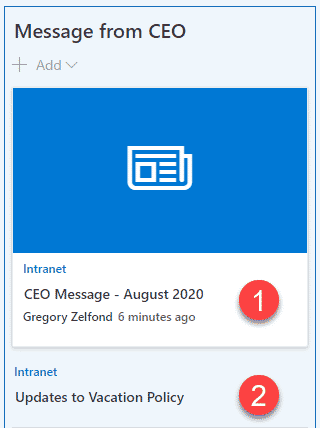
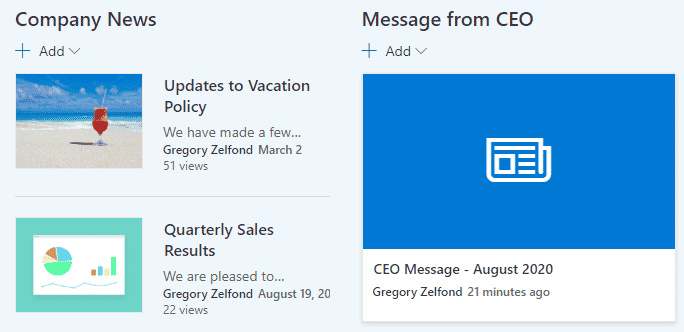
- You will now notice that the News Web Part just displays one news post I had tagged against this category. All the other posts are filtered out

- Repeat steps 1-10 above for the other News Web Parts/Categories you want to display on your page. This is the final product.
How To Create A Category In Sharepoint
Source: https://sharepointmaven.com/how-to-manage-categories-of-news-using-custom-metadata/
Posted by: steadmanpilly1987.blogspot.com
0 Response to "How To Create A Category In Sharepoint"
Post a Comment